Flutter embed Native Platforms:
Platform views allow you to embed native views in a Flutter app, so you can apply transforms, clips, and opacity to the native view from Dart.
This allows you, for example, to use the native Google Maps from the Android SDK directly inside your Flutter app.
Source Code:
You can find the source code here: native_views_flutter
Two implementations:
Platform Views on Android have two implementations. They come with tradeoffs both in terms of performance and fidelity. Platforms views require Android API 23+.
Hybrid Composition:
Platform views are rendered as they are normally. Flutter content is rendered into a texture. SurfaceFlinger composes the Flutter content and platform Views.
SurfaceFlinger:
SurfaceFlinger is a service that plays a critical part in determining what is rendered on the screen on any Android device.
SurfaceFlinger doesn't render anything on the screen.
In fact, all it does is merely composite buffers of data before handing them off to the HAL.
In layman’s terms — The SurfaceFlinger takes in buffers of display data, composites them into a single buffer, and then passes that on to the hardware abstraction layer (HAL).
Texture Layer:
Platform Views are rendered as textures. Flutter draws the platform views (via the texture). Flutter content is rendered directly into a Surface.
Let's start the app:
First of all let's create the an app in flutter:
flutter create native_views --platforms=android,ios
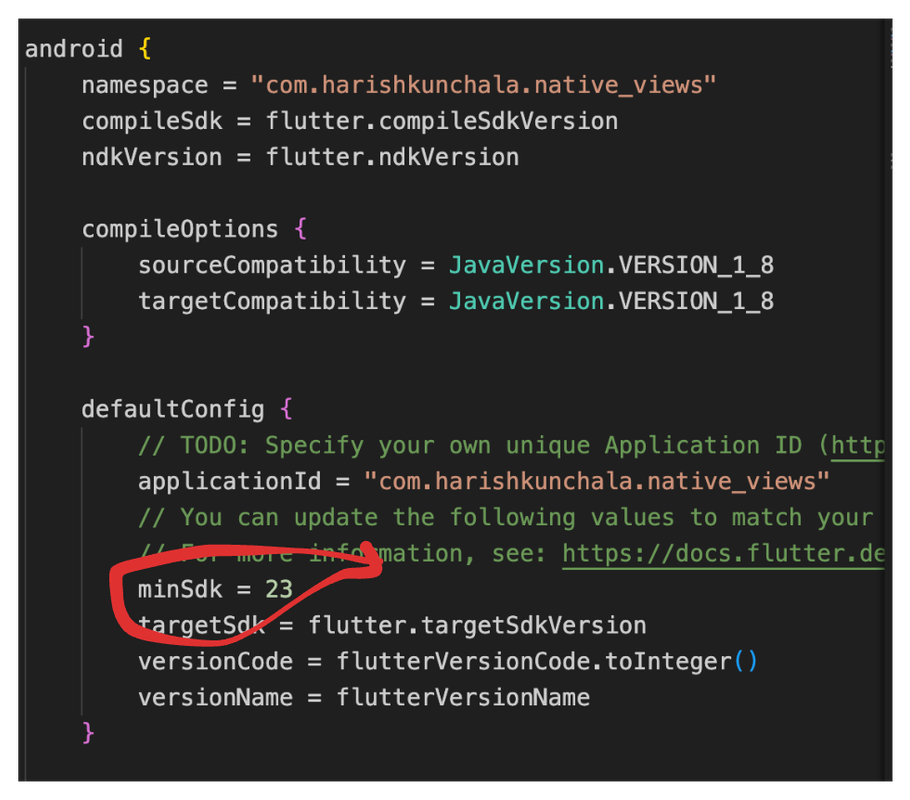
After we create it, go to android/app/build.gradle and set minSDK = 23
Platform side: Android
native_view_example.dart
Now let's create a new file named native_view_example.dart and build it in order to get the Android view:
import 'package:flutter/material.dart';
import 'package:flutter/services.dart';

class NativeViewExample extends StatelessWidget {
  const NativeViewExample({super.key});

  @override
  Widget build(BuildContext context) {
    // This is used in the platform side to register the view
    const String viewType = '<platform-view-type>';
    // Pass parameters to the platform side
    final Map<String, dynamic> creationParams = <String, dynamic>{};

    return AndroidView(
      viewType: viewType,
      layoutDirection: TextDirection.ltr,
      creationParams: creationParams,
      creationParamsCodec: const StandardMessageCodec(),
    );
  }
}
Now on the android side let's use the standard io.flutter.plugin.platform package in Kotlin:
First let's start by creating an internal class in a file named NativeView.kt which extends PlatformView.
NativeView.kt:
This view is basically what see in our Flutter. So let's open our android folder in our Android studio and get started: File: NativeView.kt
package com.harishkunchala.native_views

import android.content.Context
import android.graphics.Color
import android.view.View
import android.widget.TextView
import io.flutter.plugin.platform.PlatformView

internal class NativeView (context: Context, id: Int, creationParams: Map<String?, Any?>?): PlatformView{
    private  val textView: TextView = TextView(context)

    override fun getView(): View {
        return  textView
    }

    override fun dispose() {
    }
    init {
        textView.textSize = 72f
        textView.setBackgroundColor(Color.rgb(255,255,255))
        textView.text = "Rendered on a native Android view (id: $id)"
    }
}
NativeViewFactory.kt:
Now let's create a factory class that creates an instance of NativeView created eariler.
File: NativeViewFactory.kt:
package com.harishkunchala.native_views

import android.content.Context
import io.flutter.plugin.common.StandardMessageCodec
import io.flutter.plugin.platform.PlatformView
import io.flutter.plugin.platform.PlatformViewFactory

class NativeViewFactory : PlatformViewFactory(StandardMessageCodec.INSTANCE){
    override fun create(context: Context, viewId: Int, args: Any?): PlatformView {
        val creationParams = args as Map<String?, Any?>?
        return NativeView(context,viewId,creationParams)
    }
}
Finally let's register the platform view. You can do this in an app or a plugin. Since we are doing it in an app, for app registration, modify the app's main activity
Finally Connect Everything together in MainActivity.kt
File: MainActivity.kt
package com.harishkunchala.native_views

import io.flutter.embedding.android.FlutterActivity
import io.flutter.embedding.engine.FlutterEngine

class MainActivity: FlutterActivity() {
    override fun configureFlutterEngine(flutterEngine: FlutterEngine) {
        super.configureFlutterEngine(flutterEngine)
        flutterEngine.platformViewsController.registry.registerViewFactory("<platform-view-type>", NativeViewFactory())

    }
}
Finally let's test the app in an android emulator. Before we do that let's set this as the body of our HomePage() from our main.dart.
Call native_view_example.dart in our main.dart
File: main.dart
import 'package:flutter/material.dart';
import 'package:native_views/src/native_view_example.dart';

void main() {
  runApp(const MyApp());
}

class MyApp extends StatelessWidget {
  const MyApp({super.key});

  // This widget is the root of your application.
  @override
  Widget build(BuildContext context) {
    return MaterialApp(
      title: 'Native View Demo',
      theme: ThemeData(
        colorScheme: ColorScheme.fromSeed(seedColor: Colors.deepPurple),
        useMaterial3: true,
      ),
      home: const HomePage(),
    );
  }
}

class HomePage extends StatelessWidget {
  const HomePage({super.key});

  @override
  Widget build(BuildContext context) {
    return const Scaffold(
      body: SizedBox(
        width: double.infinity,
        child: Center(
          child: NativeViewExample(),
        ),
      ),
    );
  }
}
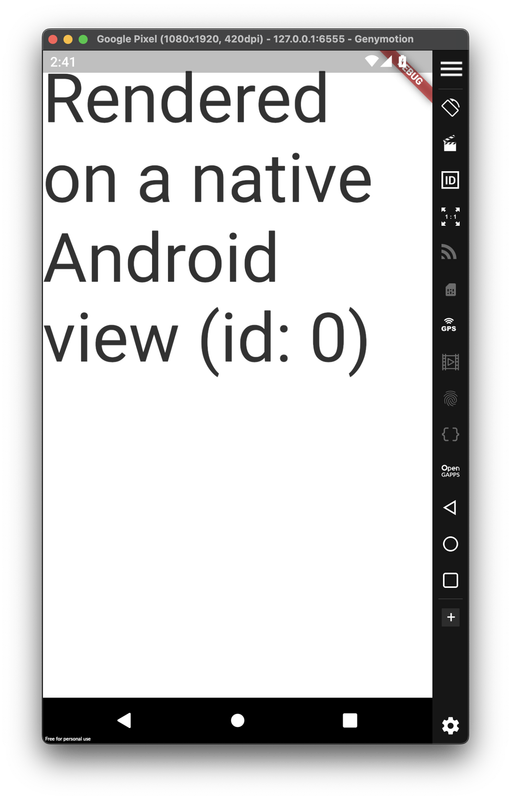
Android Output:
Perfect let's test our app: And here's output:
Platform Side: iOS
native_view_ios.dart
First of all let's create a dart file that'll show our native ios view. For this we are going to use the UiKitView
File: native_view_ios.dart
import 'package:flutter/material.dart';
import 'package:flutter/services.dart';

class NativeViewIos extends StatelessWidget {
  const NativeViewIos({super.key});

@override
Widget build(BuildContext context) {
  // This is used in the platform side to register the view.
  const String viewType = '<platform-view-type>';
  // Pass parameters to the platform side.
  final Map<String, dynamic> creationParams = <String, dynamic>{};

  return UiKitView(
    viewType: viewType,
    layoutDirection: TextDirection.ltr,
    creationParams: creationParams,
    creationParamsCodec: const StandardMessageCodec(),
  );
}
}
FLNativeViewFactory and FLNativeView
Now we need to implement the platform view and the factory. The FLNativeViewFactory creates the platform view, and the platform view provides a reference to the UIView.
File: FLNativeView.swift:
import Flutter
import UIKit

class FLNativeViewFactory: NSObject, FlutterPlatformViewFactory {

    private var messenger: FlutterBinaryMessenger

    init(messenger: FlutterBinaryMessenger) {
        self.messenger = messenger
        super.init()
    }

    func create (
        withFrame frame: CGRect,
        viewIdentifier viewId: Int64,
        arguments args: Any?
    ) -> FlutterPlatformView{
    return FLNativeView(frame: frame,
                        viewIdentifier: viewId,
                        arguments: args,
                        binaryMessenger: messenger)
    }

    /// Implementing this method is only necessary when the `arguments` in `createWithFrame` is not `nil`.
        public func createArgsCodec() -> FlutterMessageCodec & NSObjectProtocol {
              return FlutterStandardMessageCodec.sharedInstance()
        }
}


class FLNativeView: NSObject, FlutterPlatformView {
    private var _view: UIView

    init(frame: CGRect, viewIdentifier viewId: Int64, arguments args: Any?, binaryMessenger messenger: FlutterBinaryMessenger) {
        _view = UIView()
        super.init()

        // iOS views can be created here
        createNativeView(view: _view)
    }

    func view() -> UIView {
        return _view
    }

    func createNativeView(view _view: UIView) {
    _view.backgroundColor = UIColor.blue

    let nativeLabel = UILabel()
    nativeLabel.text = "Native text from iOS"
    nativeLabel.textColor = UIColor.white
    nativeLabel.textAlignment = .center

    // Set the label's size    nativeLabel.sizeToFit()

    // Center the label in the view    nativeLabel.center = _view.center

    _view.addSubview(nativeLabel)

    // Add constraints to keep the label centered    nativeLabel.translatesAutoresizingMaskIntoConstraints = false
    NSLayoutConstraint.activate([
        nativeLabel.centerXAnchor.constraint(equalTo: _view.centerXAnchor),
        nativeLabel.centerYAnchor.constraint(equalTo: _view.centerYAnchor)
    ])
}

}
Register the platform view in AppDelegate.swift:
Finally let's register the platform view with AppDelegate:
import Flutter
import UIKit

@UIApplicationMain
@objc class AppDelegate: FlutterAppDelegate {
  override func application(
    _ application: UIApplication,
    didFinishLaunchingWithOptions launchOptions: [UIApplication.LaunchOptionsKey: Any]?
  ) -> Bool {
    GeneratedPluginRegistrant.register(with: self)

      guard let pluginRegisterar = self.registrar(forPlugin: "plugin-name") else { return false}

      let factory = FLNativeViewFactory(messenger: pluginRegisterar.messenger())
      pluginRegisterar.register(factory, withId: "<platform-view-type>")
    return super.application(application, didFinishLaunchingWithOptions: launchOptions)
  }
}
Connecting it in dart:
Now in our HomePage.dart, we can use defaultTargetPlatform to detect the platform, and decide which widget to use:
class HomePage extends StatelessWidget {
  const HomePage({super.key});

  Widget getTargetPlatformView() {
    switch (defaultTargetPlatform) {
      case TargetPlatform.android:
        return const NativeViewExample();

      case TargetPlatform.iOS:
        return const NativeViewIos();

      default:
        throw UnsupportedError("Unsupported platform View");
    }
  }

  @override
  Widget build(BuildContext context) {
    return Scaffold(
      body: SizedBox(
        width: double.infinity,
        child: Center(
          child: getTargetPlatformView(),
        ),
      ),
    );
  }
}
iOS Output:
Now if we run the code on iOS simulator: Here's the output:
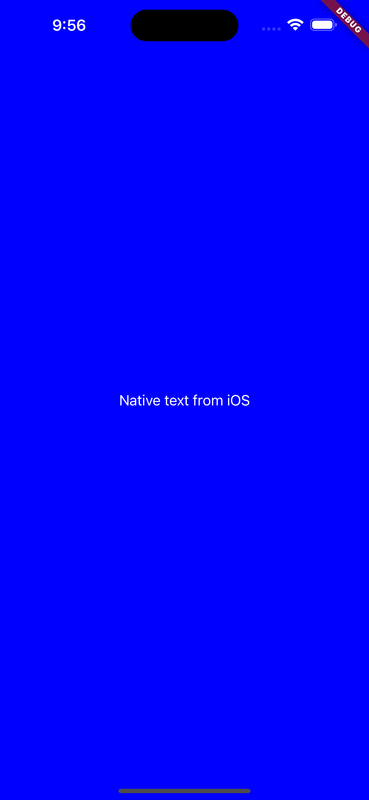
And thus we can see our iOS update.