Flutter Riverpod Tutorial Part 7: Advanced Riverpod Patterns

In this tutorial we'll dive into advanced Riverpod patterns.
Sections Covered:
Using the
familyModifierUsing the
AutoDisposeModifierKeeping Providers Alive with
keepAliveDeclaring Dependencies with
dependencies
1. Using thefamily Modifier
The family modifier allows you to create parameterized providers. This is useful when the provider's logic depends on external parameters.
User Model Class:
Let's create a user model class:
class User {
  final int id;
  final String name;
  final String email;

  User({required this.id, required this.name, required this.email});

  factory User.fromJson(Map<String, dynamic> jsonUser) => User(
      id: jsonUser['id'], name: jsonUser['name'], email: jsonUser['email']);
}
userProvider with family:
Now that we have the User let's also create a FutureProvider that gives us the user.
So couple of point in the following code
We are using the family modifier.
Thanks to the family modifier, we are able to pass an argument to the FutureProvider.
In here we are passing
int userIdNow we are using the userId in the
http.get()to get JSON data associated with the particularuserId
final userProvider = FutureProvider.family<User, int>((ref, userId) async {
  final apiResponse = await http
      .get(Uri.parse('https://jsonplaceholder.typicode.com/users/$userId'));

  if (apiResponse.statusCode == 200) {
    return User.fromJson(jsonDecode(apiResponse.body));
  } else {
    throw Exception('Unable to fetch the user');
  }
});
userWidget:
Let's create a ConsumerWidget that takes userId as a parameters and populates the users details in a ListTile
class UserWidget extends HookConsumerWidget {
  final int userId;

  const UserWidget({super.key, required this.userId});

  @override
  Widget build(BuildContext context, WidgetRef ref) {
    final userAsyncValue = ref.watch(userProvider(userId));
    return Padding(
      padding: const EdgeInsets.all(8),
      child: userAsyncValue.when(
          data: (user) => ListTile(
                title: Text(user.name),
                subtitle: Text(user.email),
              ),
          error: (error, stackTrace) => Text('Error: ${error.toString()}'),
          loading: () => const CircularProgressIndicator()),
    );
  }
}
Finally I am creating a Screen where I can call multiple users
class UsersFamilyList extends StatelessWidget {
  const UsersFamilyList({super.key});

  @override
  Widget build(BuildContext context) {
    return Scaffold(
      appBar: AppBar(
        title: const Text('Users List with Family Modifier'),
      ),
      body: const Column(
        children: [
          UserWidget(userId: 1),
          UserWidget(userId: 2),
          UserWidget(userId: 3),
        ],
      ),
    );
  }
}
Always remember that in this tutorial. We have covered two things:
family: Creates a parameterized provider that takes a user ID.
FutureProvider.family: Fetches user data based on the provided ID.
Perfect Now we can see the output here:
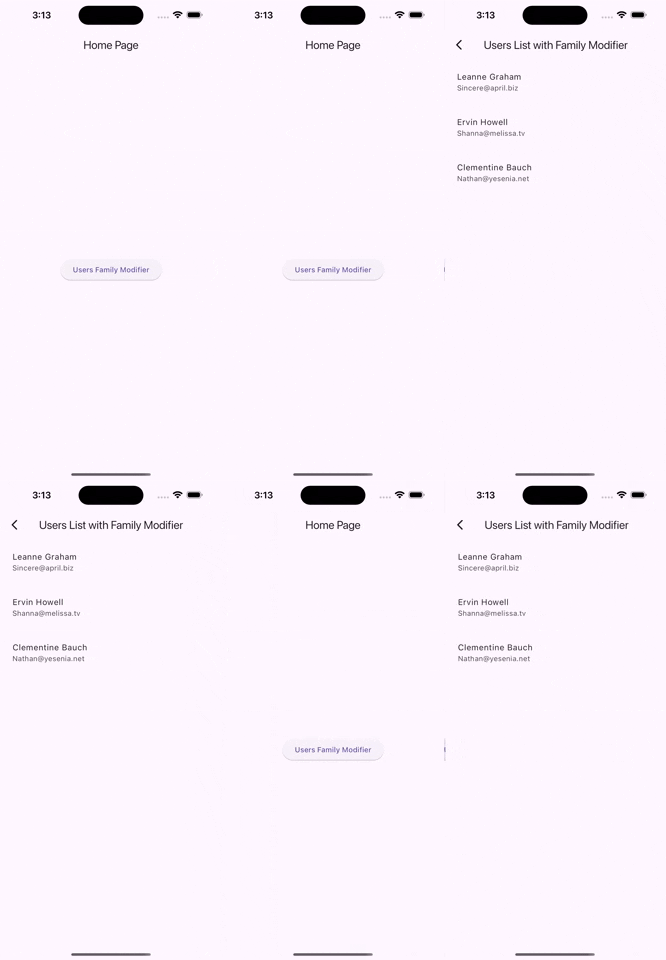
You can find the source code here: Family Modifier
2. Using theAutoDispose Modifier
The AutoDispose modifier helps manage resources by automatically disposing of providers when they are no longer needed.
State Provider with autoDispose modifier:
First of all let's create a StateProvider with a autoDispose modifier. In here we are creating a basic counterProvider that also has auto dispose. So due to that the app should dispose of the provider whenever we are not using it.
final counterAutoDisposeProvider = StateProvider.autoDispose((ref) => 0);
Counter Page:
Let's create a page where we will use the above provider. We'll create a basic page with a FAB that'll increment the value of the counter
class CounterPage extends HookConsumerWidget {
  const CounterPage({super.key});

  @override
  Widget build(BuildContext context, WidgetRef ref) {
    final count = ref.watch(counterAutoDisposeProvider);
    return Scaffold(
      appBar: AppBar(
        title: const Text('Counter Auto Dispose'),
      ),
      body: Center(
        child: Text(
          'Count: $count',
          style: const TextStyle(fontSize: 24, fontWeight: FontWeight.bold),
        ),
      ),
      floatingActionButton: FloatingActionButton(
        onPressed: () => ref.read(counterAutoDisposeProvider.notifier).state++,
        child: const Icon(Icons.add),
      ),
    );
  }
}
You can find the source code for the above section here: autoDipose Modifier
And as you can see the counter resets to 0. Every time we leave the screen
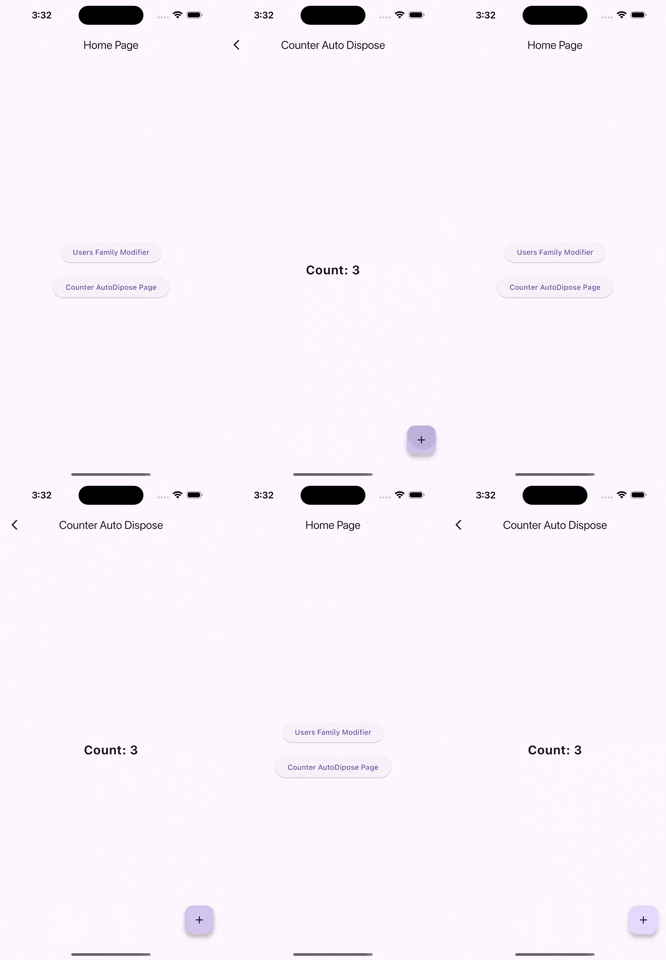
3. Keeping Providers Alive with keepAlive
The keepAlive method ensures that a provider remains active even when there are no listeners.
Create the keepAlive Provider:
final counterKeepAliveProvider = StateProvider.autoDispose<int>((ref) {
  ref.keepAlive();
  return 0;
});
keepAlive Page:
Let's create a basic page that'll read the counter similar to our previous page
class KeepAliveCounterPage extends HookConsumerWidget {
  const KeepAliveCounterPage({super.key});

  @override
  Widget build(BuildContext context, WidgetRef ref) {
    final count = ref.watch(counterKeepAliveProvider);
    return Scaffold(
      appBar: AppBar(
        title: const Text('Counter Auto Dispose'),
      ),
      body: Center(
        child: Text(
          'Count: $count',
          style: const TextStyle(fontSize: 24, fontWeight: FontWeight.bold),
        ),
      ),
      floatingActionButton: FloatingActionButton(
        onPressed: () => ref.read(counterKeepAliveProvider.notifier).state++,
        child: const Icon(Icons.add),
      ),
    );
  }
}
You can find the source code here: keepAlive Provider
And as you can see that the counter retains the value despite exiting the screen:
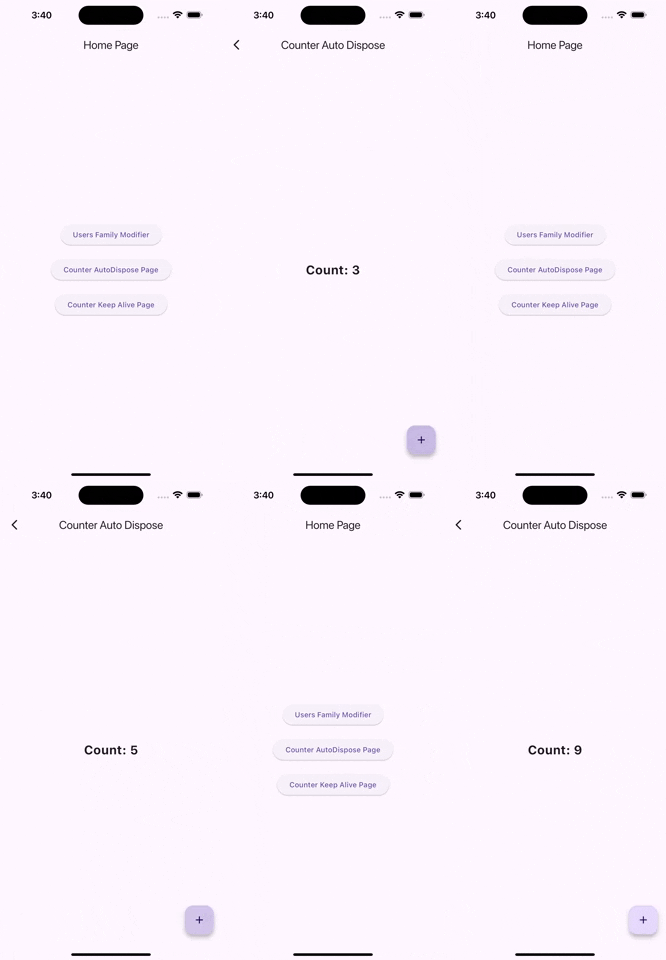
4. Declaring Dependencies with dependencies
Declaring dependencies ensures that a provider depends on another provider and rebuilds when the dependent provider changes.
Define a configProvider:
import 'package:hooks_riverpod/hooks_riverpod.dart';

final configProvider = StateProvider<String>((ref) => 'Config');

final dependentProvider = Provider<String>((ref) {
  final config = ref.watch(configProvider);

  return 'Depends on $config';
});
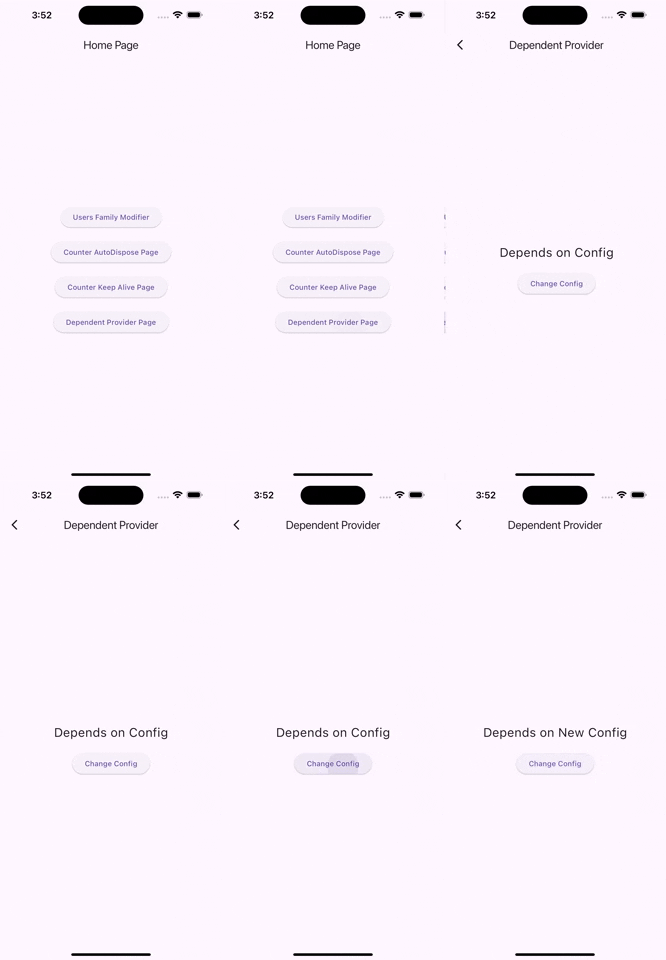
Let's change the value on a screen and see if it changes it.
Dependent Provider Page:
In the following screen. Let's change the value of configProvider when a button is clicked. So that we can see the new value from dependentProvider
class DependentProviderPage extends HookConsumerWidget {
  const DependentProviderPage({super.key});

  @override
  Widget build(BuildContext context, WidgetRef ref) {
    final dependentString = ref.watch(dependentProvider);
    return Scaffold(
        appBar: AppBar(
          title: const Text('Dependent Provider'),
        ),
        body: SizedBox(
          width: double.infinity,
          child: Column(
            mainAxisAlignment: MainAxisAlignment.center,
            children: [
              Text(
                dependentString,
                style: const TextStyle(fontSize: 24),
              ),
              const SizedBox(height: 20),
              ElevatedButton(
                  onPressed: () =>
                      ref.read(configProvider.notifier).state = "New Config",
                  child: const Text('Change Config'))
            ],
          ),
        ));
  }
}
You can find the source code here: dependent_provider
There you go:
Summary:
So finally we have looked at various modifiers and advanced patterns from Riverpod. I hope these tutorials help you in better maintenance of your application state.
Comments
Join the discussionNo comments yet. Be the first to comment.
Flutter Riverpod Tutorial
In this series, I'll cover every concept of Riverpod in a comprehensive manner, so that any user can understand total ins and outs of any Riverpod concept.