Flutter Riverpod Tutorial Part 1: Provider and StateProvider, StateNotifierProvider, ChangeNotifierProvider

Setup Riverpod
Before we start using Riverpod. Let's set it up in our Flutter Project
Add the dependency:
flutter pub add flutter_riverpod
Wrap our application with ProviderScope: This is necessary for Riverpod to work. It should wrap your top-level app widget.
So this our main.dart
void main() {
  runApp(
    const ProviderScope(
      child: MyApp(),
    ),
  );
}

class MyApp extends StatelessWidget {
  const MyApp({super.key});
  @override
  Widget build(BuildContext context) {
    return MaterialApp(
      home: const HomeScreen(),
    );
  }
}
You can find the starter code here: https://github.com/khkred/flutter_stack/tree/starter_code
1.1 Understanding Basic Providers
Providers are the fundamental building blocks of Riverpod. They are objects that encapsulate state or values and allow for dependency injection. Providers are declaratively defined and can be consumed anywhere in the widget tree.
There are different types of Providers so we'll go one.
Provider
This is the simplest form of Provider
It exposes a single value that does not change over time
It's used mainly for exposing a constant or an object that contains business logic
Example Usage:Provider
Now as we know we use Provider to all a single value that doesn't change over time. So let's create a String for now that provides greeting and then call it with a Provider.
import 'package:flutter_riverpod/flutter_riverpod.dart';

const String greeting = 'Hello, Riverpod!';

final greetingProvider = Provider<String>((ref) => greeting);
Now I can call the Provider in our HomeScreen like this:
class HomeScreen extends ConsumerWidget {
  const HomeScreen({super.key});

  @override
  Widget build(BuildContext context, WidgetRef ref) {
    final greeting = ref.watch(greetingProvider);
    return Scaffold(
      appBar: AppBar(
        title: const Text('Home Screen'),
      ),
      body: Center(
        child: Text(greeting),
      ),
    );
  }
}
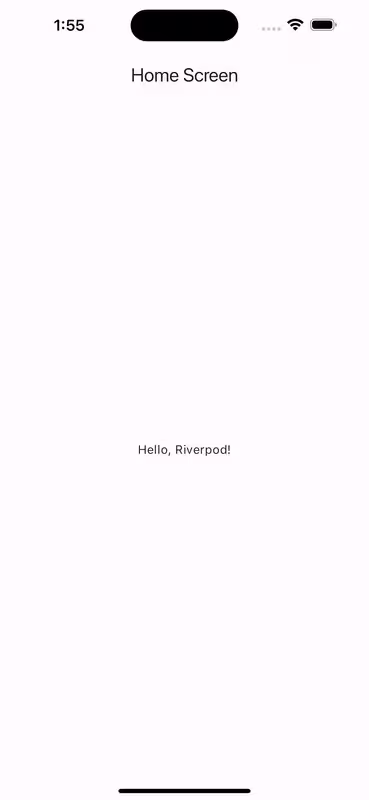
Perfect we can run the app and see the output
You can find the source code for our Provider here: https://github.com/khkred/flutter_stack/tree/provider
StateProvider:
StateProviderholds a mutable state that can be read and modifiedIt's ideal for simple states like toggles, counters, etc.
Example Usage:StateProvider
Let's create a simple counter app using StateProvider:
In our basic_providers.dart let's add a counterProvider
final counterProvider = StateProvider<int>((ref) => 0);
Now let's use the counterProvider in our home_screen.dart
class HomeScreen extends ConsumerWidget {
  const HomeScreen({super.key});

  @override
  Widget build(BuildContext context, WidgetRef ref) {
    //Basic Provider
    final greeting = ref.watch(greetingProvider);
    //State Provider
    final int count = ref.watch(counterProvider);
    return Scaffold(
      appBar: AppBar(
        title: const Text('Home Screen'),
      ),
      body: Padding(
        padding: const EdgeInsets.all(8.0),
        child: Column(
          children: [
            Text(greeting),
            const SizedBox(height: 20),
            Text(
              'Count: $count',
              style: const TextStyle(fontSize: 24),
            )
          ],
        ),
      ),
      floatingActionButton: FloatingActionButton(
        onPressed: () {
          ref.read(counterProvider.notifier).state++;
        },
        child: const Icon(Icons.add),
      )
    );
  }

}
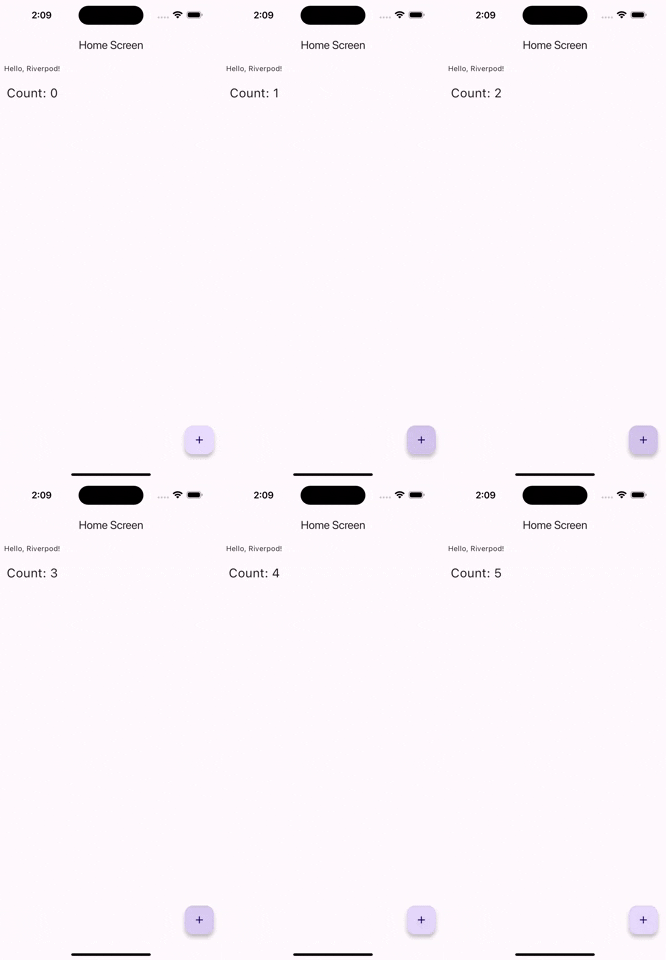
In the above example:
We defined a
StateProviderthat initializes the counter to 0.HomeScreenis aConsumerWidgetwhich usesref.watchto listen to the provider.When the button is pressed,
ref.readis used to increment the counter.
You can find the source code for them here: https://github.com/khkred/flutter_stack/tree/state_provider
1.2 Advanced State Management with Riverpod
StateNotifierProvider
The
StateNotifierProviderallows you to separate your state from your business logicWhich can help make your code more testable and reusable.
It uses the
StateNotifierclass to handle logic and emit changes in state.
Step 1: Setting Up StateNotifier
- Create a StateNotifier class: This class will hold your state and the methods to modify it.
We are going to create a small to-do list . So that we add and remove the values and see them in our to_do_screen
So here's our TodoNotifier :
import 'package:flutter_riverpod/flutter_riverpod.dart';

class TodoNotifier extends StateNotifier<List<String>> {
  //We are initializing the state with an empty list
  TodoNotifier() : super([]);

  //This method will add a new todo to the list
  void addTodo(String todo) {
    state = [...state, todo];
  }

//This method will remove a todo from the list
  void removeTodo(String todo) {
    state = state.where((item) => item != todo).toList();
  }
}

final todoCounterProvider = StateProvider<int>((ref) => 0);

final todoProvider =
    StateNotifierProvider<TodoNotifier, List<String>>((ref) => TodoNotifier());
- Use StateNotifierProvider to provide it: This provider will listen to the StateNotifier and update the UI when changes occur.
class TodoListScreen extends ConsumerWidget {
  const TodoListScreen({super.key});

  @override
  Widget build(BuildContext context, WidgetRef ref) {
    List<String> todos = ref.watch(todoProvider);
    final todoCounter = ref.watch(todoCounterProvider);

    return Scaffold(
      appBar: AppBar(
        title: const Text('Todo List'),
      ),
      body: ListView(
        children: todos
            .map((todo) => ListTile(
                  title: Text(todo),
                ))
            .toList(),
      ),
      floatingActionButton: FloatingActionButton(
        onPressed: () {
          ref.read(todoCounterProvider.notifier).state++;
          ref.read(todoProvider.notifier).addTodo('Todo $todoCounter');
        },
        child: const Icon(Icons.add),
      ),
    );
  }
}
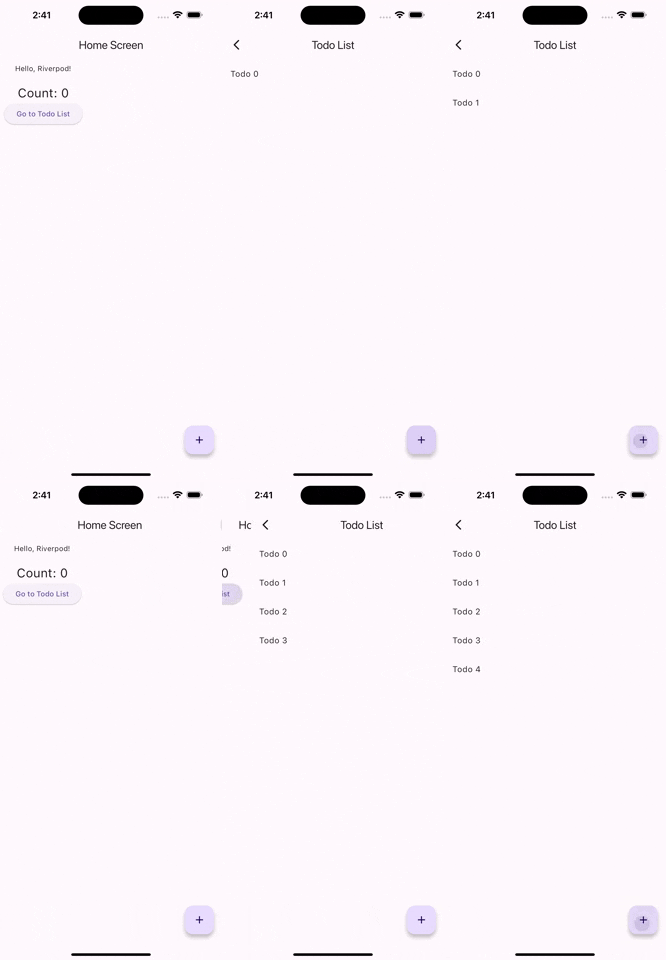
As we can see once we added todo even if we go back to another screen. The value still stays, thanks to state management of Riverpod
Source Code: https://github.com/khkred/flutter_stack/tree/state_notifier_provider
ChangeNotifierProvider
The ChangeNotifierProvider is useful when your state management involves multiple pieces of state that need to be updated in response to actions. It works well with Flutter's ChangeNotifier.
Step 1: Create a ChangeNotifier
import 'package:flutter/material.dart';
import 'package:flutter_riverpod/flutter_riverpod.dart';

class CounterNotifier extends ChangeNotifier {
  int _count = 0;

  int get count => _count;

  void increment() {
    _count++;
    notifyListeners();
  }

}

final counterChangeNotifierProvider = ChangeNotifierProvider((ref) => CounterNotifier());
Step 2: Using ChangeNotifierProvider in your UI
import 'package:flutter/material.dart';
import 'package:flutter_riverpod/flutter_riverpod.dart';
import 'package:flutter_stack/providers/counter_notifier.dart';

class CounterScreen extends ConsumerWidget {
  const CounterScreen({super.key});

  @override
  Widget build(BuildContext context, WidgetRef ref) {
    final counterNotifier = ref.watch(counterChangeNotifierProvider);
    return Scaffold(
      appBar: AppBar(title: const Text('Counter'),),
      body: Center(
        child: Text('Count: ${counterNotifier.count}', style: const TextStyle(fontSize: 25),)
      ),
      floatingActionButton: FloatingActionButton(
        onPressed: () {
          counterNotifier.increment();
        },
        child: const Icon(Icons.add),
      ),
    );
  }

}
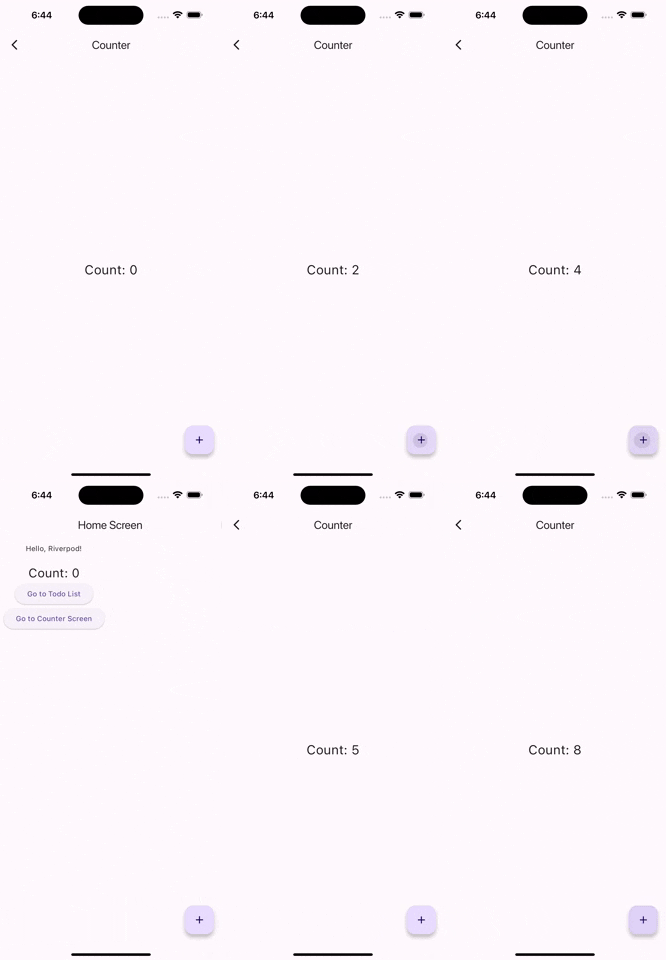
In this example:
CounterNotifiermanages the counter state and usesnotifyListeners()to inform listeners about state changes.The UI reacts to these changes by rebuilding whenever
notifyListeners()is called.
You can download the source code here: https://github.com/khkred/flutter_stack/tree/change_notifier
Difference between StateNotifierProvider and ChangeNotifierProvider
ChangeNotifierProvider and StateNotifierProvider in Riverpod serve similar purposes in managing state, but they have key differences in how they manage and update that state. Each is suited to different scenarios depending on the complexity of the state and the specific needs of your application. Here’s a breakdown of the differences:
ChangeNotifierProvider
Flutter Integration:
ChangeNotifieris a part of the Flutter framework itself, making it a familiar option for those who have used Flutter’sProviderpackage before transitioning to Riverpod.State Management: It allows for mutable state management within the
ChangeNotifierclass. You directly mutate the state of the object and callnotifyListeners()to inform all the listeners about changes.Use Case: Best suited for more granular control over the state when multiple properties within a model can change independently, and you want to notify widgets to rebuild whenever any property changes.
Performance: Every time
notifyListeners()is called, all the widgets that listen to the provider will rebuild. This can lead to performance issues if not managed carefully, especially with large or complex widgets.
Example:
class CounterModel extends ChangeNotifier {
  int _count = 0;
  int get count => _count;

  void increment() {
    _count++;
    notifyListeners();  // Notifies all the listening widgets to rebuild
  }
}
StateNotifierProvider
Separation of Concerns:
StateNotifiercomes from thestate_notifierpackage and is not part of core Flutter, offering a cleaner separation of state management from UI.Immutable State Management: Typically,
StateNotifierworks with immutable states. You replace the entire state instead of mutating it. This pattern is beneficial for predictability and debugging.Use Case: Ideal for scenarios where the entire state object is replaced rather than mutating individual fields within the state. It’s particularly effective in more complex state management situations where immutability is a priority.
Performance: Since it encourages immutability, the state changes are more predictable and easier to track. This can lead to better performance optimizations, as widgets react only to relevant state changes.
Example:
class CounterNotifier extends StateNotifier<int> {
  CounterNotifier() : super(0);

  void increment() {
    state = state + 1;  // Replaces the state with a new value
  }
}
Choosing Between Them
Complexity: If your state is complex but does not require the widgets to update for partial changes, or you prefer immutability,
StateNotifierProvideris likely more suitable.Familiarity and Fine Control: If you need fine-grained control over what changes within the state or are more familiar with traditional Flutter state management,
ChangeNotifierProvidermight be the better choice.
Each of these providers has its strengths and is designed to work best under different circumstances. The choice between them often comes down to personal preference and specific project requirements concerning state management practices.
Comments
Join the discussionNo comments yet. Be the first to comment.
Flutter Riverpod Tutorial
In this series, I'll cover every concept of Riverpod in a comprehensive manner, so that any user can understand total ins and outs of any Riverpod concept.